In this tutorial we will be detailing installation and update of the Nessus Professional vulnerability scanner and its plugins using the Offline method.
Offline method is useful in situations where we are required to perform a vulnerability scan of an isolated environment, without having access to the Internet.
- New Nessus offline installation
- Overview and prerequisites
- 1. Install Nessus offline
- 2. Generate challenge code
- 3. Generate and download license
- 4. Activate Nessus offline
- 5. Install Nessus plugins offline
- Update Nessus plugins offline
- Overview and prerequisites
- 1. Generate challenge code
- 2. Download plugins
- 3. Update Nessus plugins offline
- Conclusion
This tutorial follows the official Tenable instructions for managing Nessus installations offline.
New Nessus offline installation
In order to demonstrate the installation process, we will be using Microsoft Windows as the target (offline) operating system which is deployed in an isolated environment.
We will be connecting to it over a secure channel (e.g. VPN) using Remote Desktop Protocol (RDP) interface. This will allow us to access the desktop and to transfer installation files.
Note that the selection of Microsoft Windows is purely arbitrary and solely for the demonstration purposes. The steps documented in this tutorial are applicable to all other supported operating systems:
- Linux
- FreeBSD
- Mac OS X
Overview and prerequisites
There are 2 important prerequisites for installing Nessus offline.
First, we need to have administrative privileges on the target offline system. This is needed in order to install the Nessus package on the system.
Secondly, we need to have access to at least one other computer connected to the Internet. This is because some steps of the installation process have to be performed on the Tenable website online.
Therefore, throughout this tutorial we will be differentiating between:
- Computer A – target / offline Nessus scanner
- Computer B – our online computer
Here’s an overview of the installation process in a nutshell and what needs to be done on which computer:
| Operation | Computer A (offline Nessus scanner) | Computer B (online computer) |
| Download Nessus installer | X | |
| Install Nessus | X | |
| Generate challenge code | X | |
| Generate and download license | X | |
| Download latest plugins | X | |
| Activate Nessus offline | X | |
| Update plugins | X |
Let’s start.
1. Install Nessus offline
1.1. First we have to download the latest Nessus installation package from the official Downloads page:
The latest Windows package is ‘Nessus-8.12.0-x64.msi’ at the time of writing of this article.
1.2. Transfer the installer onto the target offline computer (A).
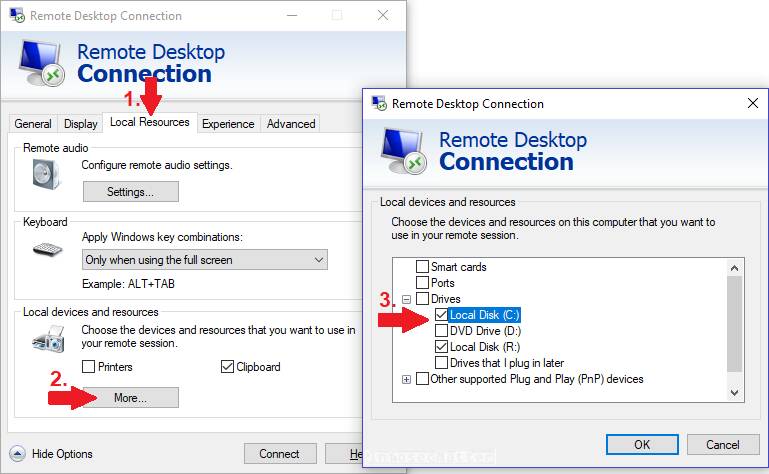
If we are connecting from a Windows system, we can use the built-in RDP drive sharing functions to upload the installer package onto the target system. Here’s a quick illustration on how to enable it:
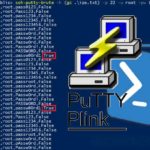
If we are connecting using Linux (e.g. Kali), we could use the xfreerdp client and its ‘/drive’ option to upload the installer. For instance:
cd /home/kali/Downloads
xfreerdp /d:ABC /u:admin /p:password /v:10.100.202.43 /drive:data,`pwd`
Using these methods we should be able to comfortably share files with the target offline system (A) and vice versa.
1.3. Install the package (Nessus-8.10.1-x64.msi) on the target system.
1.4. After the installation process is finished and the nessus service is started, we have to continue with the installation using the web interface.
1.5. Open a web browser (on the target offline system A) and navigate to the following URL:
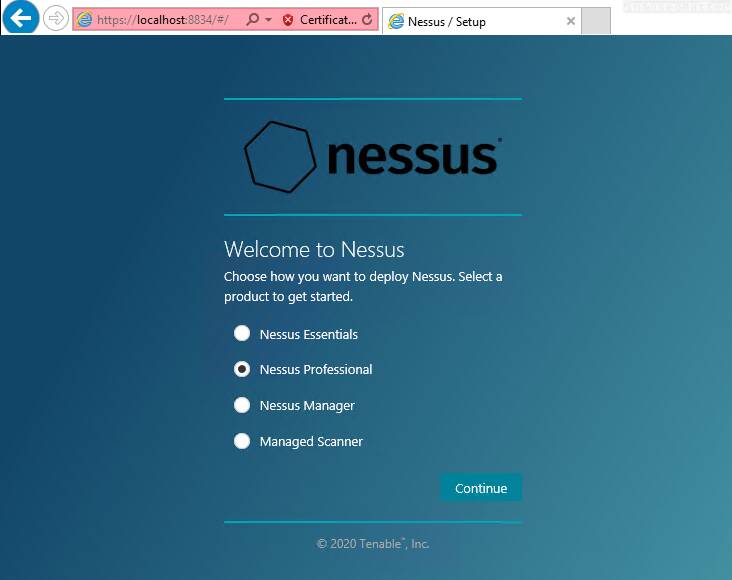
Select ‘Nessus Professional’ and click ‘Continue’.
2. Generate challenge code
In the next step we are presented with the Nessus activation page (Register Nessus):
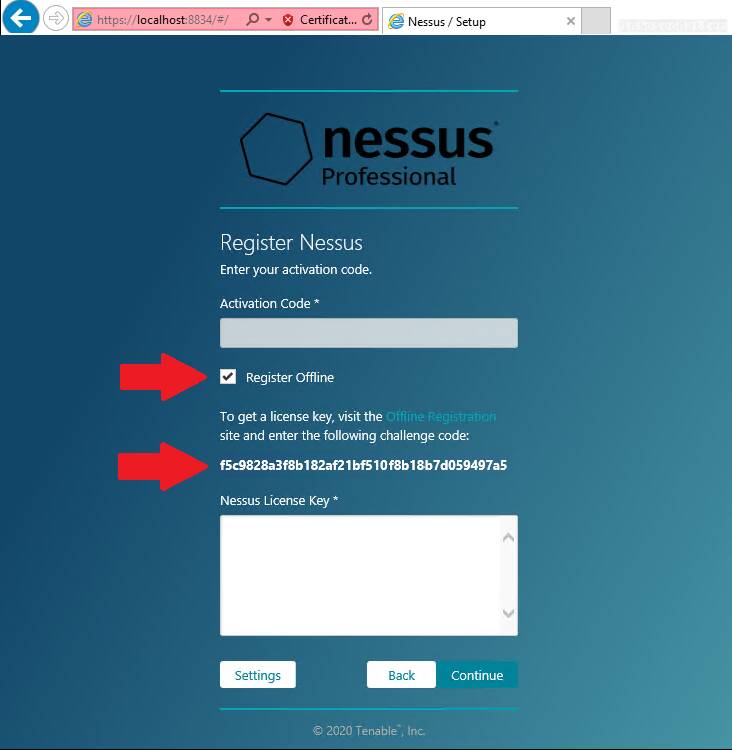
In order to install Nessus using the offline method, we have to select the ‘Register Offline’ option and make note of the challenge code.
We will need the challenge code in the next step which has to be performed on the online computer (B).
3. Generate and download license
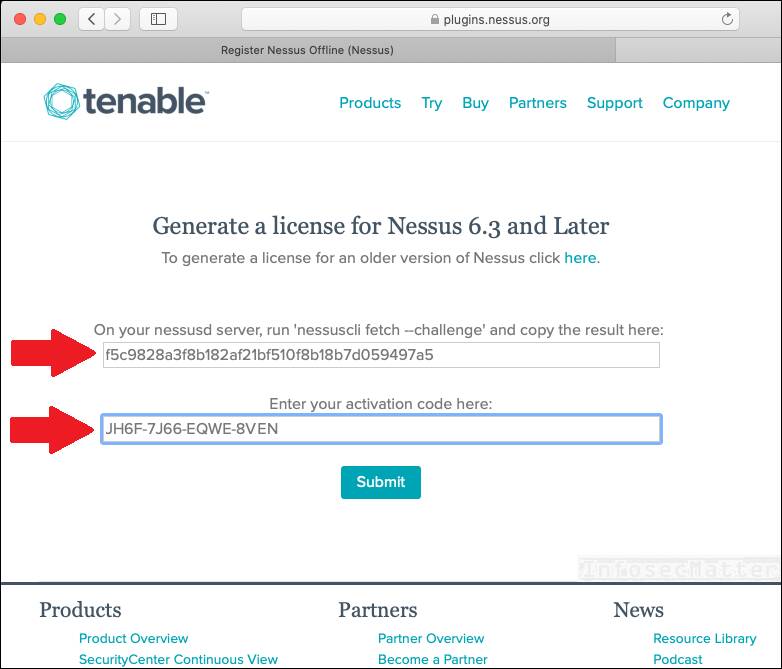
On the online computer (B), open a web browser and navigate to the Tenable offline registration page on the following URL:
Here on this page we have to provide the challenge code obtained from the target offline computer (A) and also provide our Nessus activation code (license) that we possess.
The following screenshot illustrates:
After submitting the activation codes, we should obtain:
- Tenable license file
- A link to the latest plugins
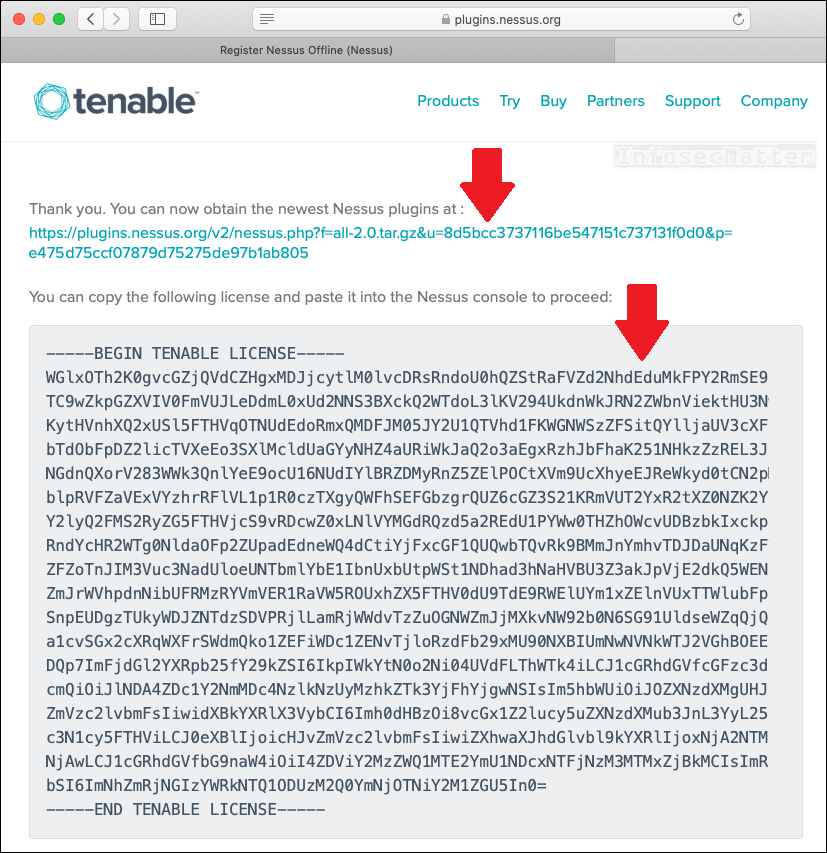
Now take the obtained license file along with the plugins archive all-2.0.tar-gz (approx. 239 MiB) and transfer them onto the target offline computer (A).
4. Activate Nessus offline
To complete the activation process on the offline computer (A), paste the license file to the ‘Nessus License Key’ text area and click ‘Continue’, similarly as in this screenshot:
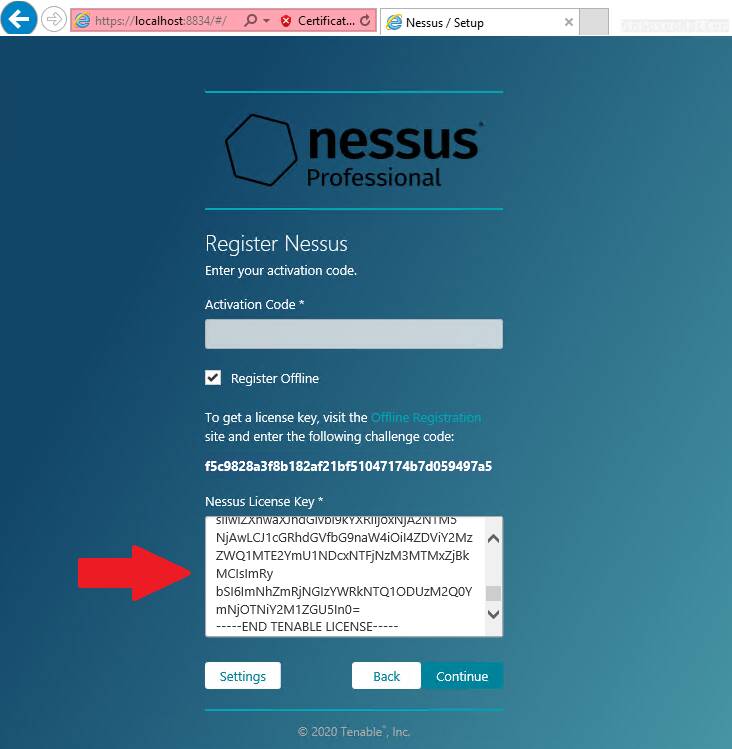
After the submit, we should have fully activated our Nessus scanner instance and we should now be able to create our administrative user.
5. Install Nessus plugins offline
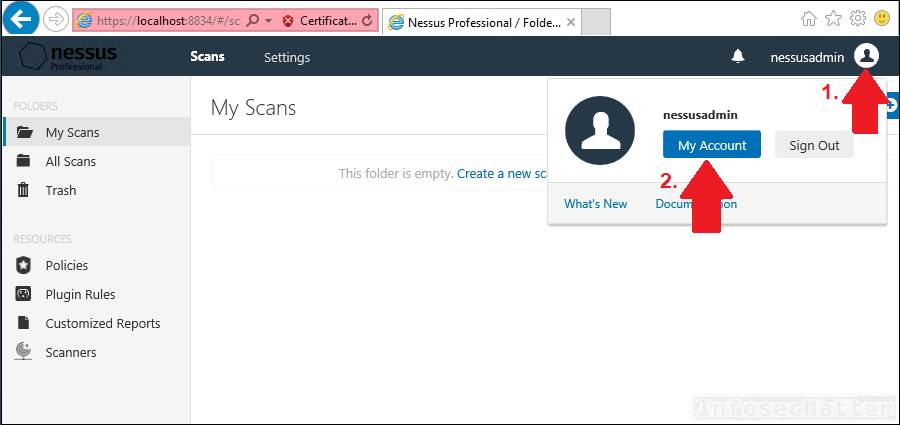
Now when we can login and navigate through the Nessus web user interface, it’s time to upload the latest plugins that we downloaded in the step 3.
In the Nessus top navigation menu navigate to ‘My account’:
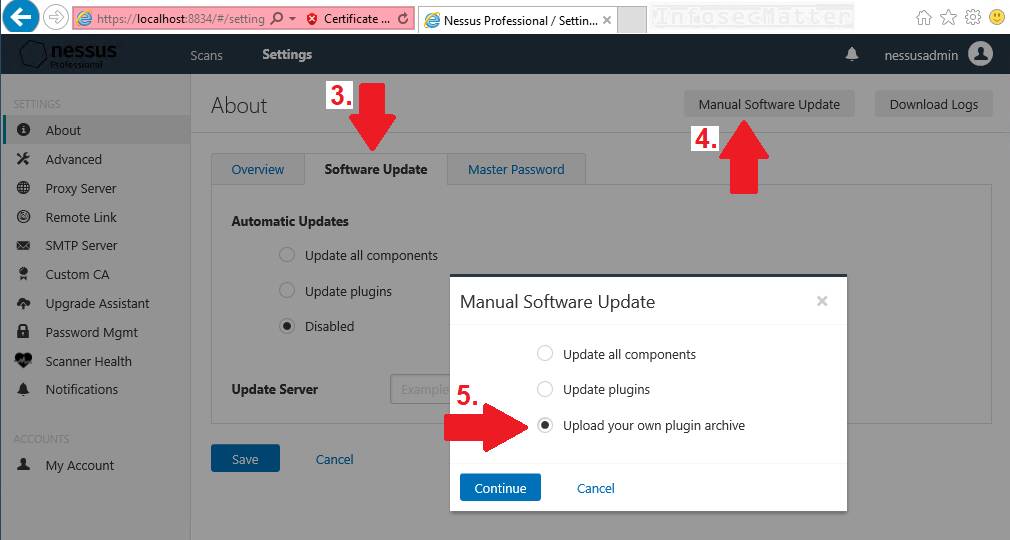
Click the ‘Software Update tab’. In the upper-right corner, click the ‘Manual Software Update’ button.
The Manual Software Update dialog box appears. Select ‘Upload your own plugin archive’, and then select ‘Continue’:
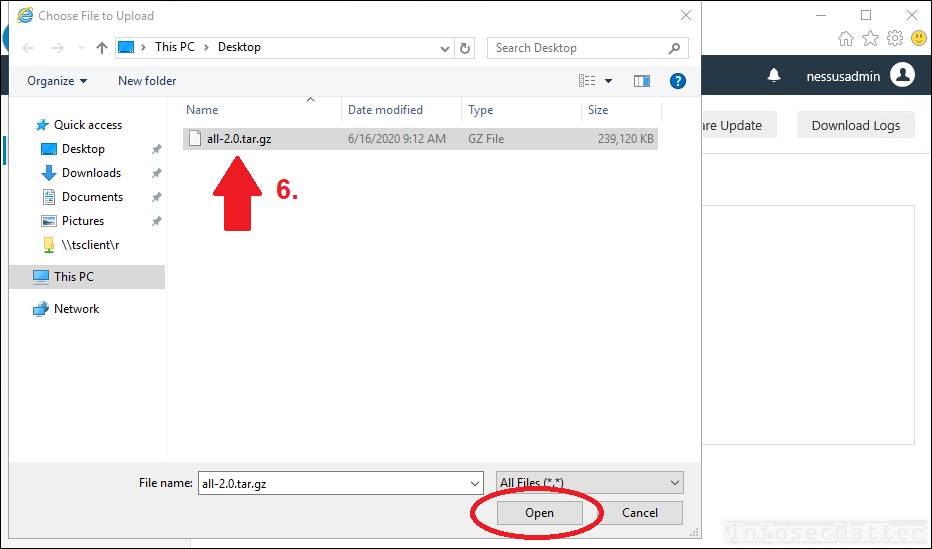
Navigate to the compressed TAR file that we have uploaded onto the system (all-2.0.tar.gz), select it and then click ‘Open’.
Now the plugin installation will begin.
Note that the plugin installation will probably take anywhere from 15-30 minutes to complete and we should wait for it to complete before doing any scanning.
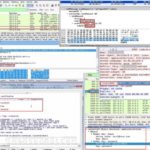
Unfortunately we cannot directly see the progress, but in the Windows Task Manager we can see that the Nessus process (nessusd) is busy processing the plugins:
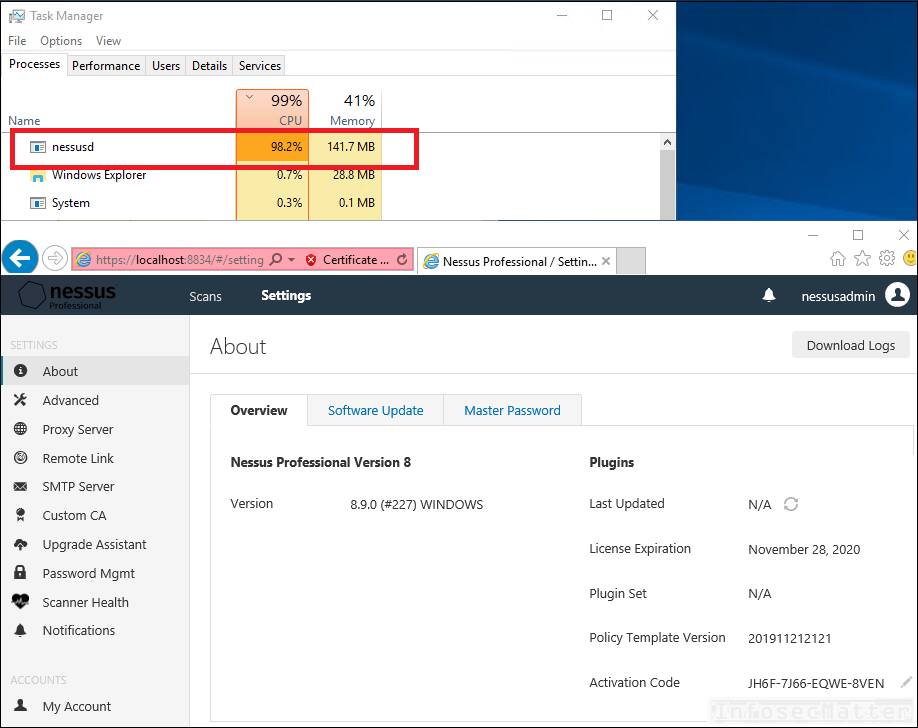
We simply have to wait.
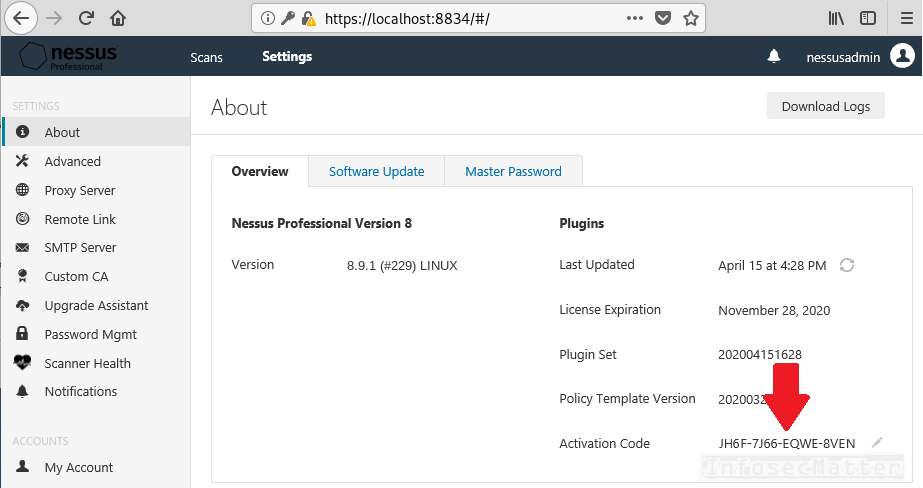
Once the CPU load drops to 0%, it is an indication of completion. As a proof, check the Plugins “Last Updated” date in the web interface.
Once the date is refreshed, congratulations! You have successfully installed, activated and fully updated your Nessus scanner offline!
Go back to top.
Update Nessus plugins offline
This section applies to cases when we have an existing offline Nessus instance in an isolated environment which we would like to update with newest plugins.
Overview and prerequisites
In order to download latest plugins from the Tenable website, we are going to need the following information:
- Challenge code (e.g. aaaaaa11b2222cc33d44e5f6666a777b8cc99999)
- License key (e.g. AAAA-BBBB-CCCC-DDDD)
In the following sections, we will go in detail on how to get them from our existing Nessus installation.
Here’s an overview of the update process in a nutshell:
| Operation | Computer A (offline Nessus scanner) | Computer B (online computer) |
| Generate challenge code | X | |
| Download latest plugins | X | |
| Update plugins | X |
1. Generate challenge code
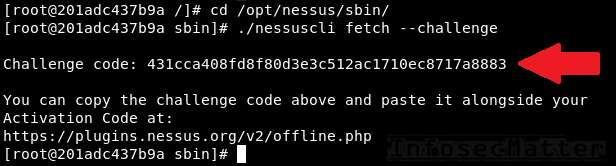
To generate challenge code from our existing Nessus installation (offline computer A), we have to run the following command:
nessuscli fetch --challengeThe ‘nessuscli’ command is typically located in these directories:
| OS | Location |
| Linux | /opt/nessus/sbin/nessuscli |
| FreeBSD | /usr/local/nessus/sbin/nessuscli |
| Mac OS X | /Library/Nessus/run/sbin/nessuscli |
| Windows | C:\Program Files\Tenable\Nessus\nessuscli.exe |
Here’s an example of obtaining challenge code from Nessus installed on Kali Linux:
The current Nessus activation key (license) can be located in the Nessus web user interface:
With these 2 pieces of information, we can now download the latest plugins.
2. Download plugins
On the online computer (B), navigate to the Tenable offline registration page on the following URL:
Provide the challenge code and the Nessus activation code (license).
Here’s an example:
After submitting the activation codes, we should obtain a link to the latest plugins:
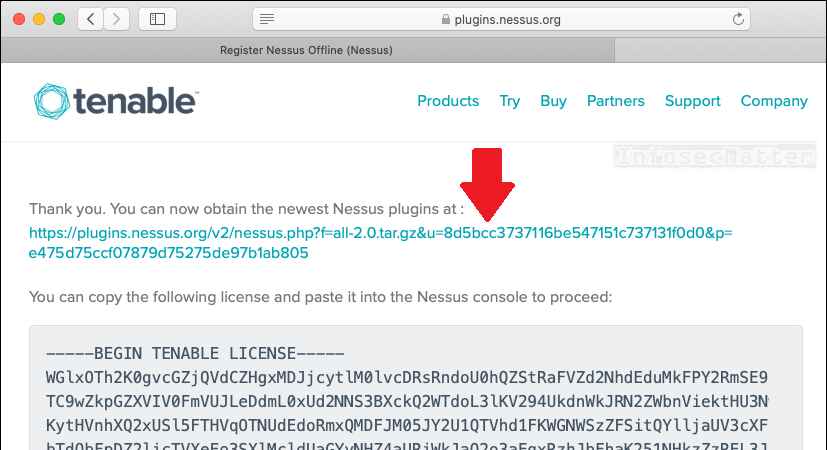
Download the plugins archive all-2.0.tar-gz (approx. 239 MiB) and transfer it onto our offline Nessus instance (computer A).
3. Update Nessus plugins offline
Once we have the plugins archive transferred onto our target offline computer (A), we can use the same procedure as described in step 5 above to install them.
Alternatively, we could also just simply run the following command to install the plugins archive:
nessuscli update all-2.0.tar-gzAnd that’s it! Now we just have to wait 15-30 minutes for the plugins to be compiled and fully applied.
Make sure to check the ‘nessusd’ process once in a while and the Nessus web interface (https://localhost:8834) to find out whether the plugins has been already fully applied.
Go back to top.
Conclusion
In this article we have learned how to install Nessus Professional on a computer without Internet connection. We have also learned how to update Nessus plugins on an offline Nessus installation / without Internet connection.
If you would like to learn more about Nessus capabilities, please check out our detailed Nessus overview.
SHARE THIS


MOST VIEWED TOOLS